The Best Bike Patch Kit for 2023
Every cyclist needs a reliable bike patch kit to help fix unexpected punctures - click here to find the best bike patch kit for you
Whether you are an avid cyclist exploring the great outdoors, or you enjoy taking short rides for some fresh air, you need a reliable bike patch kit. If you’ve ever been stranded by the roadside because of a breakdown or tire puncture, you know how frustrating it can be. This is why every cyclist needs one of these bike patch kits to serve as a quick fix.
To keep those wheels turning, let’s dive into some of the most user-friendly, durable, and innovative kits available on the market today.
Everything We Recommend

1. Best Product
LEZYNE

2. Runner Up
REMA TT 02 Tour Patch Kit

3. Cost Effective
Slime SKABS

4. Almost Made the Cut
Multi-Function Rectangle Motor Bicycle Bike & Tyre Tire Inner Tube Puncture Rubber Patches Repair Kit
1. Best Product
1. Best Product
LEZYNE
This Small, Light, and High-Quality patch kit is a must-have for any cyclist.
Specifications
- Item Dimensions LxWxH
- 4 x 4 x 4 inches
- Item Weight
- 0.02 Pounds
Pros
 Ultra-compact Polypropylene case
- Six Glueless Patches
- Small, Light, and High-Quality
Cons
 Only Includes One Tire Boot
Previous Customer Experience
| Overall |
|
4.5 |
Who It's For
Inside a slim, simple plastic wallet-like sleeve, the LEZYNE Smart Bicycle Tire Patch Kit has all the tools you'll need to temporarily patch your tires. So if you're searching for a patch kit to take with you on your rides, this bike patch kit is excellent for simple repairs without letting punctures keep you down.
Why It's Great
This puncture repair kit aims to make patching a puncture as easy as possible. It comes with six glueless patches, an emergency tire boot, and a stainless steel tube scuffer packaged in a tiny polypropylene box, making it small enough to fit even in the slimmest saddlebags.
The patches in this package have a strong and secure grip thanks to specially formulated, extremely aggressive adhesives that are also very flexible. The stainless steel scuffer, instead of sandpaper, ought to be more resilient and less prone to losing its abrasive properties over time. The tire boot might also be useful if your outer tire sustains significant damage.
Potential Flaws
It's critical to avoid wrinkles because the Lezyne patches are pretty thin, which is especially crucial in this situation given their tiny size. To ensure that there is as much patch as possible on all sides, striking the hole in the center is also considerably more crucial. Nonetheless, the patches are really effective.
Other Features
These patches would not only bring you home but owing to their gradual leaks, you would generally not have to replace the tube. Its included tire boot earns another point because most patch kits do not always include one. The boot prevents the tube from protruding through significant tire cuts. It would save you from a sticky situation because it stays put and conforms to the majority of tire casings. The patches function well both with and without the scuffing because of how beautifully they curve around the circumference and across seams.
Product Specifications
Item Package Dimensions (LxWxH): 2.6 x 1.34 x 0.28 inches
Package Weight: 2.20 pounds
Item Dimensions (LxWxH): 4 x 4 x 4 inches
Item Weight: 0.02 Pounds
Brand Name: LEZYNE
Color: Polished
Size: One Size
Sport Type: Triathlon
2. Runner Up
2. Runner Up
REMA TT 02 Tour Patch Kit
This patch kit is perfect to have on hand, promising to work without seams or leaks.
Specifications
- Package Weight
- 0.02 Kilograms
- Item Dimensions LxWxH
- 1.57 x 0.87 x 3.15 inches
Pros
- Easy to use
- Cheap Price Tag
Cons
- Lack Lustre Instructions
Previous Customer Experience
| Adhesion |
|
4.6 |
| Easy to use |
|
4 |
| Value for money |
|
3.9 |
| Durability |
|
3.5 |
Who It's For
This is your best option if you're looking for a high-quality, multipurpose bike patch kit. SKABS functions on BMX, mountain, and high-pressure road tubes. The patches' affordability and resilience make them an excellent choice for any passionate rider. They also work with inflatables, tarps, tents, rafts, plastic, and vinyl repairs.
Why It's Great
Slime Skabs have a somewhat bigger casing than others, but they are still small enough to fit in a pocket. The patches have a very sticky feel to them. The metal scuffer will also be functional throughout the pack. After testing, they were securely adhered, hadn't crumpled or shifted, and performed like a durable fix.
Potential Flaws
The adhesive is really sticky. Avoid touching it with your fingers at all costs as doing so will reduce the adhesive's effectiveness. Since the patch is so flexible, this is a little challenging at first, but it gets simpler as you get the hang of it.
Some say they might occasionally fail, although this is extremely uncommon. Most failures are a result of very big seams and holes. In these situations, a replacement tube is required. However, it is not a huge dealbreaker, given how highly most buyers laud the product.
Other Features
Unlike the older vulcanizing patches, which must be thoroughly sanded and applied using glue from a tube that is always dry by the time you need it, these come pre-glued. Instead, just wipe the tube with the given piece of sandpaper, or, if you're in a hurry, your shirt; remove the back peel, and adhere a patch over the freshly cleaned hole. It works excellently and lasts longer than glue tubes.
Product Specifications
Item Package Dimensions (LxWxH): 4.45 x 2.48 x 0.63 inches
Package Weight: 2.20 pounds
Item Dimensions (LxWxH): 8 x 6 x 2 inches
Item Weight: 0.02 Pounds
Brand Name: Slime
Size: 1 inch
3. Cost Effective
3. Cost Effective
Slime SKABS
This pick offers a surprisingly easy adhesive with a highly generous price tag.
Specifications
- Item Dimensions LxWxH
- 8 x 6 x 2 inches
- Item Weight
- 0.02 Pounds
Pros
- Six Pre-Glued Patches
- Includes Metal Scuffer
Cons
- This pick works best as an emergency fix rather than a permanent solution
Previous Customer Experience
| Easy to use |
|
3.7 |
| Value for money |
|
2.6 |
| Adhesion |
|
2.5 |
Who It's For
Are you looking for a bike patch kit that allows you to swiftly and efficiently pull one out, slap it into place, and resume your rides as quickly as possible? Then we advise taking a look at this Park Tool patch kit. For the protection of the adhesive patches, the package is waterproof. Fit the patches quickly and easily, then watch in awe as the tire consistently reaches its maximum pressure, as if by magic.
Why It's Great
The Park Tool GP-2 Super Patch Kit's self-adhesive material adheres incredibly effectively. Carrying one with your spares and leaving the other two at home might be a good biking strategy. The GP-2 will meet most of your hole-sealing needs because it comes with six sandpaper patches and fits neatly into a small carry-on package.
In addition, this kit is incredibly lightweight and compact. A sandpaper tube is included in addition to the patches to smooth the area and improve the airtight seal. Each patch has a flexible, elastic texture that stretches and contracts with the tire as you bike.
Potential flaws
The patches work well for swiftly and neatly patching up tiny punctures without the need for glue or the time it takes for them to set. However, even if these patches are a fantastic remedy, consider them before riding with them permanently rather than getting a new tire.
Although they are strong, they are not entirely impervious to tearing. Some users also stated that they were less effective if you used high pressure (more than 70 psi) in your tires. Nonetheless, they have proven their usefulness by providing a long-lasting seal without the need for glue.
Other Features
The provided sandpaper is a great addition. It's small yet with a fine grain and good performance. They are as easy to apply as stickers. Simply apply it using your thumbs, and then inflate the tube to see if the patch is still in place. Additionally, non-rubber materials, such as waterproof panniers, may be repaired with the Park Tool Super Patch. It may also be used as an emergency patch on dry bags, tents, coats, sleeping mats, and other objects.
Product Specification
Item Package Dimensions (LxWxH): 4.25 x 4.02 x 0.71 inches
Package Weight: 2.20 pounds
Item Dimensions (LxWxH): 5.98 x 3.07 x 0.31 inches
Item Weight: 0.04 Pounds
Brand Name: Park Tool
Sport Type: Cycling
4. Almost Made the Cut
4. Almost Made the Cut
Multi-Function Rectangle Motor Bicycle Bike & Tyre Tire Inner Tube Puncture Rubber Patches Repair Kit
With 48 patches included in one purchase, this pick makes up for any concerns of wasting patches with the comfortable quantity.
Specifications
- Package Weight
- 85 Grams
- Size
- 1.38 x 0.98in
Pros
- Each is in protective airtight tin foil
- High-Quality Rubber
- 48 Patches per Purchase
Cons
- Unimpressive Adhesive
- Expensive
- Single Tube of Glue Included
Previous Customer Experience
| Overall |
|
3.2 |
Who It's For
This bike patch kit is an absolute must for all cyclists, including those who ride for recreation, commuting, time trials, triathlons, off-road riding, family outings, touring, expeditions, fitness, sports, etc. In addition, all varieties of rubber inner tubes, including those on e-bikes, mountain bikes, road bikes, cyclocross bikes, hybrid bikes, BMX cycles, and fixed-gear fixies, may also be patched with this little glue-free patch kit.
Why It's Great
The ReHook Gooeys patches come in a pack that is quite similar in size and weight to the Park GP-2s, and they include a large square of patches. This provides a wider surface area that can be adhered to. Additionally, the kit is packaged in a thin container that fits neatly into your jersey pocket or saddle bag.
Gooeys are incredibly robust and highly sticky. giving you a trustworthy seal that won't fail you. Use the abrasive sandpaper in the puncture repair kit to sand the tube. Peel the gooey material off the sheet of puncture repair patches. Due to their flexibility, the patches can expand as your tube expands. Stick the patch over the hole to seal it. The adhesive creates a firm seal in just one minute, allowing you to swiftly get back on the road.
Potential Flaws
The patch maintains pressure during the ride really well. On closer inspection, however, several customers claimed that the center portion covering the hole stayed bonded while the patch corners did not. As a result, it gets you home, but it needs another repair to be dependable.
Who This Is For
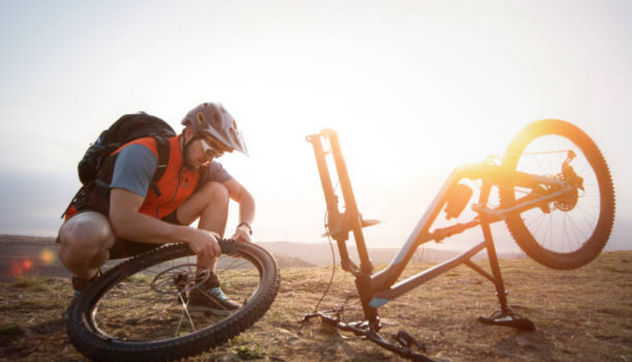
As any ardent biker can tell you, tire punctures become increasingly likely the more you use your bike. And, more especially, you cannot afford to go off-road biking without one of these kits. From striking a pointy rock or picking up a spike in a back lane, a bike patch kit might make the difference between getting home and having to walk several miles or waiting by the side of the road for help. Therefore, the best course of action in those circumstances is to repair your inner tubes using a bike patch kit.
What comes in a bike patch kit?
There are many different styles and sizes of the best bike patch kits available. In essence, they are a collection of tools that may be used to patch a hole.
These tools often come packaged in a compact container or bag. To patch a puncture, you’ll need a vulcanizing/rubber solution, a patch, two tire levers to help remove your tire, and a scuffer — a square of sandpaper or something similar.
However, some puncture repair kits include self-adhesive patches, eliminating the requirement for vulcanizing fluid. Unfortunately, tire levers may only be included in some kits, so you must buy them individually.
Is a bike patch kit worth it?
Yes, in a nutshell. A puncture or an abrupt breakdown may leave you stuck on the side of the road. Anyone who has done any amount of biking will know what a hassle that can be. However, with the right equipment and a patch kit, you can almost always get back on your bike quickly. These kits are so lightweight and compact, though, that you may as well bring one anyway.
These are also handy if you cannot remove the wheel to change the tube for whatever reason. Often, a puncture may be fixed without actually removing the wheel. The finest patch kits will provide you with a quick, reliable fix for a punctured inner tube, saving you from having to throw it away and maybe allowing you to use it for years. Even if you only replace a tube while moving, you can still fix the problem when you reach home.
Why You Should Trust Us
Finding the right patch kit for you and your bike can be an extreme sport. So then, we browsed through customer reviews of well-known top sellers to learn more about the bike patch kit. We analyzed user reviews, first-hand feedback from other sources, and new products on the market to provide you with the best items. The outcome is a thorough evaluation that you may use to pick the best bike patch kit for you.
How We Picked
When it comes to the best bike patch kit, the options are plentiful. Given this, we evaluate the following considerations when making recommendations.
Quality of kit
You do not want to be there when you hear a harsh wallop, followed by a hiss, and realize that your front tire has just taken a beating and there is no spare and no cell service. You can prevent this by investing in a high-quality, well-planned bike patch kit. If the proper equipment is available, a flat tire is such a simple problem that you can fix it in a jiffy.
Contents of kit
Your portable bike patch kit should include a patch, two tire levers to help you remove your tire, and a scuffer. Which particular items you ultimately require will depend on the difficulty of the road or path you’re on, how near the route is to a neighborhood, and your mechanical know-how. If you’re a beginner biker, you may start with only the essentials, as previously stated, and progressively add tools as you acquire expertise and plan more challenging trips.
Durability
Every cyclist will have a puncture at some point in their life. If you ride your bike a lot during the week, there’s a good chance you’ve encountered them at least sometimes. The bike patch kit comes in handy at that point. However, if the kit is not durable, you’ll have to keep repairing the same puncture over and over. A durable kit depends on the quality of the accessories, the quality of construction, and the type of patches. Therefore, look for kits that use high-quality, long-lasting materials such as vulcanizing rubber for patches, and sturdy metal for tire levers and other tools.
Range of puncture prevention items
All bikers have gone through the frustrating experience of puncturing a tire. If you already have a puncture, the list above will come in handy. However, we now have items that can prevent punctures or make them less severe. These items include;
Tire sealants: The tire sealant is a liquid applied within the tire to help prevent punctures. It can be left inside without causing any issues, but it must be installed while the tire is whole and not punctured. The liquid foundation is key because it is thin enough to swiftly and efficiently locate and repair even the smallest punctures.
Tire inserts: Tire inserts are ring-shaped parts that can be closed or left open depending on the model. They are plastic, come in various sizes, shapes, and densities, and are only compatible with tubeless tires. By giving the tire an additional internal layer of protection and a shoulder, they serve the primary purpose of preventing punctures. However, when a puncture is unavoidable, the tire inserts still allow for run-flat mode pedaling even when the tires are completely flat.
Strengthened inner tube: Because it adds another layer of protection, the strengthened inner tube can effectively avoid punctures. In addition, some inner tubes are highly durable because they have a special sealant that can quickly fix punctures and contain butyl. Although it weighs about 0.85 pounds, its advantages are substantial and more than justify its weight.
Price vs. quality
While it’s crucial to arm yourself with the best equipment available, you must also budget for it. Shopping without any financial constraints is not a good idea. Thus, ensure that the bike patch kit you choose won’t break the bank.
Size of kit
Building a complete bike patch kit might take a lot of work. It involves striking a balance between needs, fear, and space limitations. Many possible mechanical problems may occur, and carrying an 11-pound toolbox around would be necessary to prepare for them. But you can usually escape trouble with simple tools and extra components. Tire repair is usually a major focus of a decent repair kit. Even with a tubeless setup, flats inevitably occur. Therefore, adding a bike patch kit to your saddlebag is always a good idea. Most of them are available in convenient sizes that won’t take up much space in your toolbox.
Portability
A patch kit investment is similar to purchasing insurance because you may only occasionally use it. Still, you will be happy to have it in the unlikely event that you do. Of course, this implies that you must bring it with you. If not, it would be like having insurance but forgetting your card or all of your paperwork at home and being unable to use it. Most of them come in handy-sized varieties! Therefore, we advise bringing your patch kit whenever it is practical.
Glueless options
The most crucial decision when selecting the finest patch kits is whether to use the older glue-based patches or the more modern glue-free ones.
Glue-on patches provide a more long-lasting repair than glueless ones. However, for on-the-road repairs, it requires carrying extra with you. Given how frequently most riders will use it, it probably won’t affect you much, but it’s something to keep in mind.
Another factor to consider is how fast the solvent in the rubber solution can dry out. A sealed tube lasts longer, but when you want to use it again, it has solidified or turned into a sticky liquid after being opened. Even a well-sealed tube can dry out, especially if exposed to heat.
On the other hand, the majority of glueless patches have a nearly infinite lifespan, so you can rely on them to help you when you suffer a puncture. They are also considerably more portable than glue kits because they are much more compact.
Instructions
The best part about patch kits is that they come equipped with everything you need to use them effectively. In addition, you can really operate the tools within, thanks to the included instructions. Online training videos for using various bike patch kits are also available if you need more help or prefer to learn visually.
How We Picked
-
Quality of Kit
A flat tire is a very minor problem compared to everything else that could go wrong with your bicycle while you're riding. To get back on the road, all you need is a kit filled with high-quality patching supplies. A high-quality kit guarantees that your bike will be operational up until you can have it properly repaired at a shop or at home. As a result, we made certain that these bike patch kits include dependable accessories.
-
Contents of Kit
Every patch kit comes with the bare essentials you need to quickly repair a puncture or any other minor problem. Some of these items include an air pump, a multi-tool, patch glue, tire levers, sandpaper, and a spare inner tube. No matter how skilled you are with mechanics, you will need the bare essentials from the best bike patch kit. You may gradually add gear as you start to plan more challenging rides.
-
Durability
Nothing is worse than being in the middle of a riding trip when a jagged pebble suddenly shoots through the tire. So, to mend your tire, we researched the strongest, most dependable, and toughest bike patch for even the most challenging jobs.
-
Cost-Effectiveness
Nobody likes to splurge excessively. But buying a quick-and-cheap bike patch kit without thinking about the quality increases the risk of tire damage, especially over time.
Care and Maintenance
The steps for fixing a flat tire with best bike patch kit are as follows:
- Take off the bicycle wheel: Before you take the wheel off the bike, you must keep it upright. If you wish to remove the back wheel, shift the drivetrain. Open the quick release or unthread the thru-axle to remove the wheel. You may now remove the tire when you remove the wheel. The tire can be partially removed.
- Locate the flat’s source: To determine where the tire loses air, run your fingertips around the interior of the rim and tire. You may pump air into the tube to pinpoint the leak’s source, simplifying the operation.
- Patch the tube: The tube can be repaired with a glue-on or glueless combination. Put the patch on each tube where the leak occurs and push firmly until the patch adheres to the tube.
- Set up the tube: Put the tube back inside the tire once it has been inflated. You can now mount the tire to the rim by moving the bead further away from yourself. Lastly, inflate the tire to the required pressure once the tube is inserted into the tire.
- Place the wheel in: The wheel should be attached after the tire has been inflated. Ensure that the quick disconnect or thru-axle lever is on the other side of the drivetrain. Insert the thru-axle closely and shut the release.
Dealing with long-term prevention with a bike patch kit
There is a lifespan for inner tubes. Since it’s brought on by friction between the inner tube and the rim’s hole that it passes through, the inner tubes will wear down over time. A handful of them may rupture around the valve while you’re riding. Therefore, replacing your inner tubes with brand-new ones when you service your bike once a year is important. It’s excellent practice for your bike’s continuous, routine maintenance.
Use only new tires
Old tires may be the cause of your frequent flats. Inspecting the fabric on the inside of the tire ensures the thread is not frayed or worn. Although the exterior rubber may appear in horrible condition, switching to a new tire is not essential unless there are apparent cuts. What’s vital to note is that when the inner fabric or the rubber edges that fit within the rim begin to deteriorate, it’s time to replace them.
Make use of a wider tire
A wider tire could be a wise choice if you commute or bike on rugged roads. Since there is more air in the tire, it will be more resistant to pinch flats or impact punctures, which are prevalent on challenging roads. The weight gain associated with a wider tire is the sole disadvantage. However, unless you’re competing or climbing high inclines, this shouldn’t significantly affect your usual training or commuting.
Choose a proper inner tube
Make sure you use the appropriate inner tube if you intend to use a wider tire. Like tires, inner tubes have different diameters. The rubber of the inner tube will be stretched too thin if you purchase a tire with a 0.98-inch width but keep a tube with a 0.90-inch width, increasing your risk of getting a flat. To be safe, choose a tube that is the proper size for your tire.
Pay attention to your riding environment
The main lanes of traffic are often free of glass and other objects that may cause a flat. The issue is that bikers frequently cycle closer to the shoulder, where most of the glass and other dangerous materials accumulate. Therefore, a puncture is more likely to occur if you often cycle there. Riding as safely away from the drain as possible is advised if there are no bike lanes. Moreover, moving away from the sidewalk also increases your visibility to oncoming traffic. Your chances of suffering an impact puncture will go down if you pay attention to what’s in front of you.
Do not cycle on a punctured tire
The bike will still move even if your tire is flat. However, it could travel very slowly. Plus, if the inner tube is not leaking, your tire might not be completely flat. You may be able to ride on a flat tire for a while, depending on the quality of your bike’s rim and the terrain you are on. You can ride for a mile or more if the landscape is nice and level. The range your tire can travel also depends on the type of rim. Carbon rims will distort and collapse more quickly than aluminum rims. However, eventually, riding with a flat tire is not recommended since the wheel will likely fail if it drags on the ground.
Be careful when removing the cause of the puncture
To fix the puncture, you must first identify what caused it. Then, remove all your gear before tipping the bike over and letting it rest with its weight on the saddle and handlebars. It’s crucial to ensure that whatever is damaging your tire is removed. Next, check the interior of your tire for any sharp objects, but proceed cautiously in case there is something dangerous, like glass.
Sources and Research
Further Reading and Similar Topics

May 8, 2027
National Bike Week
National Bike Week encourages communities across Ireland to embrace the joy of cycling every May. This annual event promotes health, sustainability, and community spirit through various bike-riding activities. Grab your helmet, tune up your bike, and explore scenic routes, join group rides, or simply commute by bike.

December 6, 2026
Global Fat Bike Day
Global Fat Bike Day gears up every first Saturday of December, inviting riders worldwide to celebrate their love for these unique, wide-tired bicycles. Grab your fat bike and hit the snow, sand, or mud, connect with fellow enthusiasts, and share your adventures online!

May 1, 2027
National Bicycle Safety Month
National Bicycle Safety Month champions safe cycling practices throughout May. This month-long observance, backed by the NHTSA, reminds both cyclists and motorists to share the road responsibly. Learn essential safety tips, support advocacy groups, and commit to safer biking habits for a healthier, greener commute.